Pages

Tuesday, December 27, 2011

You ain’t nothin’ but a hound dog...


I just finished the book, The Art of Racing in the Rain, and I have to say that it was my favorite book of the year. It tells the story of a family through the perspective of their dog, Enzo. It is an amazing story that made me laugh out loud and cry from page to page.  Enzo expresses himself the way we wish our dogs could. It is a fantastic and heartwarming story and I cannot recommend it enough.

After finishing the book, I decided to do something special for our dog, Teddy.  What can I say, I am a sucker for that mutt. So, I started doing some research on homemade dog treats and found that they are not only simple but also dirt cheap to make. The best part about them is that I know what Teddy is eating and that makes me feel great.  Because we keep his treats in a glass container on the counter, I wanted the treats to look great too.  I bought dog treat cookie cutters (which you can find online or at any Michael's craft store), but you could just as easily cut them into strips with a pizza cutter (I can promise your dog will not care).

Whenever I am working on a batch of these treats, Teddy spends the whole time in the kitchen with me, sniffing the air and licking his chops. It is fun and rewarding.  Give it a try!

Peanut Butter Dog Biscuits

2 Cups whole wheat flour
1 Cup white flour
1/2 cup peanut butter
1 cup water (or chicken broth)
Preheat the oven to 350 F.

Whisk together the oil, peanut butter and water.

Mix together the flours and add flour, one cup at a time, forming a dough. Knead dough into firm ball and roll to 1/4 inch thickness.

Cut into shapes using cookie cutters or into 3 to 4 inch pieces. Place on parchment-lined cookie sheet.

Bake for 20-30 minutes.

Wednesday, December 7, 2011

Ah brown sugar how come you taste so good!

Turn on your ovens, it is finally Fall! Is there anything better than fresh baked anything? Seriously? I love summer and all of the smoking and grilling that comes with it, but there is just nothing like smelling up the whole house with the scent of fresh baked bread. Especially when that bread is filled with cinnamon and brown sugar, then you have something that's worth getting out of bed for.


Homemade Cinnamon Rolls take a little time to make but they beat the pants off of those puny, tasteless things that come in those scary tubes that pop open. The flavor and texture of these will blow your mind, and you can make a whole batch for the price of just one of those buns in the mall, and of course the best part of all, you can make extra frosting! I have been using Alton Brown's recipe for Overnight Cinnamon Rolls for years and I have had no reason to try another one since. Enjoy. (And Check out all of Alton Brown's Cookbooks, I have them all and reference them often)

Overnight Cinnamon Rolls
Recipe by: Alton Brown (http://www.altonbrown.com/)

4 large egg yolks, room temperature
1 large whole egg, room temperature
2 ounces sugar, approximately 1/4 cup
3 ounces unsalted butter, melted, approximately 6 tablespoons
6 ounces buttermilk, room temperature
20 ounces all-purpose flour, approximately 4 cups, plus additional for dusting
1 package instant dry yeast, approximately 2 1/4 teaspoons
1 1/4 teaspoons kosher salt
Vegetable oil or cooking spray

Filling:

8 ounces light brown sugar, approximately 1 cup packed
1 tablespoon ground cinnamon
Pinch salt
3/4-ounce unsalted butter, melted, approximately 1 1/2 tablespoons

Icing:

2 1/2 ounces cream cheese, softened, approximately 1/4 cup
3 tablespoons milk
5 1/2 ounces powdered sugar, approximately 1 1/2 cups

Directions:

For the dough: in the bowl of a stand mixer with the whisk attachment, whisk the egg yolks, whole egg, sugar, butter, and buttermilk. Add approximately 2 cups of the flour along with the yeast and salt; whisk until moistened and combined. Remove the whisk attachment and replace with a dough hook. Add all but 3/4 cup of the remaining flour and knead on low speed for 5 minutes. Check the consistency of the dough, add more flour if necessary; the dough should feel soft and moist but not sticky. Knead on low speed 5 minutes more or until the dough clears the sides of the bowl. Turn the dough out onto a lightly floured work surface; knead by hand about 30 seconds. Lightly oil a large bowl. Transfer the dough to the bowl, lightly oil the top of the dough, cover and let double in volume, 2 to 2 1/2 hours.

Combine the brown sugar, cinnamon and salt in a medium bowl. Mix until well incorporated. Set aside until ready to use.

Butter a 9 by 13-inch glass baking dish. Turn the dough out onto a lightly floured work surface. Gently shape the dough into a rectangle with the long side nearest you. Roll into an 18 by 12-inch rectangle. Brush the dough with the 3/4-ounce of melted butter, leaving 1/2-inch border along the top edge. Sprinkle the filling mixture over the dough, leaving a 3/4-inch border along the top edge; gently press the filling into the dough. Beginning with the long edge nearest you, roll the dough into a tight cylinder. Firmly pinch the seam to seal and roll the cylinder seam side down. Very gently squeeze the cylinder to create even thickness. Using a serrated knife, slice the cylinder into 1 1/2-inch rolls; yielding 12 rolls. Arrange rolls cut side down in the baking dish; cover tightly with plastic wrap and store in the refrigerator overnight or up to 16 hours.

Remove the rolls from the refrigerator and place in an oven that is turned off. Fill a shallow pan 2/3-full of boiling water and set on the rack below the rolls. Close the oven door and let the rolls rise until they look slightly puffy; approximately 30 minutes. Remove the rolls and the shallow pan of water from the oven.

Preheat the oven to 350 degrees F.

When the oven is ready, place the rolls on the middle rack and bake until golden brown, or until the internal temperature reaches 190 degrees F on an instant-read thermometer, approximately 30 minutes.

While the rolls are cooling slightly, make the icing by whisking the cream cheese in the bowl of a stand mixer until creamy. Add the milk and whisk until combined. Sift in the powdered sugar, and whisk until smooth. Spread over the rolls and serve immediately.

Monday, November 28, 2011

Slide to the left, slide to the right.....

OK, after a long hiatus after my first post, I think I finally have some time to tackle this blog again. I hope everyone BEARS with me as I work out the kinks, I can make you one promise, if you try the food you will not be disappointed.

Sunday was week 11 of the NFL season, and with that came our inaugural and most likely final, Slider Cook-off at the weekly Strle BEARS party! Let me tell you there are not enough circuits in the average American household to handle the power requirements for 5 electric griddles. But once we got them all fired up and spread throughout the house, Erin loved that clean-up, we were ready to rock! Luckily Corey in his infinite genius made a meatball slider, so his could be warmed in the oven. The other 5 cooks had to try and get 20 sliders made during halftime of the game, we finished in time for the 4th quarter. I am still waiting for a reply to my request to lengthen halftime for NFL games, 15 minutes is just not enough time.

But after the long ordeal of cooking and assembling 20 sliders each, or 120 total (holy crap!) we got everyone fed and were able to see the rest of the game! Each slider was awesome, and after all the drama we didn't have the energy for the judging but it seemed most people liked Schawn's Grilled Cheese Bar-b-Que slider (and yes that's two grilled cheese sandwiches for the buns) the best, the other sliders of the day were: Cory's Meatball Slider on Garlic bread with Fresh Mozzarella, my Dad's (Ken) Chorizo slider with chipotle mustard and a Jerk Pork slider with Smoked Gouda Cheese Sauce, Nick's Bacon Burger with Pepper Jack cheese and garlic bread and finally my All Beef Slider with Onion Jam, Gruyere Cheese, Arugula and a homemade Brioche Bun.

I heard about Onion Jam a few years ago on a show on food network and have been intrigued ever since, I finally had a reason to make it and WOW! this could be the greatest condiment on the planet. As soon as I tried it I knew it had to be the star of my slider, so I just added a few things to offset the sweetness of the jam, the peppery arugula and Gruyere cheese were the perfect compliment. Check back as I will try and get the other recipes from the slider cook-off up! Also leave a comment if you think of another use for the onion jam, I am going to keep this in my refrigerator all the time so keep them coming. Enjoy.

Onion Jam

3 Slices Bacon
4 lbs Yellow onions, sliced thin
2 tsp Kosher Salt
2 TBSP Olive Oil
1 1/2 Cups Sugar
1 Cup Dark Brown Sugar
2 Cups Beer, preferably not "light"
1 Cup Balsamic Vinegar

Place a large pot over medium-low heat and add the bacon, and cook until crisp. Do not rush this we want to render out the fat from the bacon. Remove the bacon when crisp.

Increase heat to medium-high and add onions, salt and olive oil. Stir to coat all of the sliced onions with the oil and bacon fat. Cover with a tight fitting lid and cook for 20 minutes, stirring once halfway through the cooking process. Continue to cook, stirring every 5 minutes, until the onions are golden brown.

When the onions are golden brown, reduce heat to medium, add the sugar, brown sugar, crumbled bacon, beer and balsamic vinegar, cooking, uncovered, until viscous (about 1-2 hours). Be sure to stir the jam every 10-15 minutes while cooking reducing to every 5 minutes as the jam nears the right consistency, which is very thick and jam like. If you drag a wooden spoon through the pot and it leaves a deep valley, then your jam is done.

Stored in the refrigerator your jam will keep at least 3-4 weeks, though it probably wont last that long!

Light Brioche Buns

Adapted from Hidefumi Kubota, Comme Ça, Los Angeles (Taken from the New York Times)


3 TBSP warm milk
2 tsp active dry yeast
2 1/2 TBSP sugar
2 large eggs
3 Cups bread flour
1/3 Cup all-purpose flour
1 1/2 tsp salt
2 1/2 TBSP unsalted butter, softened.


In a glass measuring cup, combine 1 cup warm water, the milk, yeast and sugar. Let stand until foamy, about 5 minutes. Meanwhile, beat 1 egg.

In a large bowl, whisk flours with salt. Add butter and rub into flour between your fingers, making crumbs. Using a dough scraper, stir in yeast mixture and beaten egg until a dough forms. Scrape dough onto clean, unfloured counter and knead, scooping dough up, slapping it on counter and turning it, until smooth and elastic, 8 to 10 minutes.

Shape dough into a ball and return it to bowl. Cover bowl with plastic wrap and let rise in a warm place until doubled in bulk, 1 to 2 hours.

Line a baking sheet with parchment paper. Using dough scraper, divide dough into 8 equal parts (I divided into 16 equal parts  for sliders). Gently roll each into a ball and arrange 2 to 3 inches apart on baking sheet. Cover loosely with a clean kitchen towel and let buns rise in a warm place for 1 to 2 hours.

Set a large shallow pan of water on oven floor. Preheat oven to 400 degrees with rack in center. Beat remaining egg with 1 tablespoon water and brush some on top of buns. Bake, turning sheet halfway through baking, until tops are golden brown, about 15 minutes. Transfer to a rack to cool completely.

Thursday, September 1, 2011

Going Green!

Welcome to 'Play with your food', my first food blog! I chose the name because my favorite thing about cooking is the ability to change things and adapt recipes for personal tastes. Hopefully, I can bring some of what I have learned over my short time cooking to this page and maybe even get a few people into the kitchen. I appreciate everyone who reads and I look foreward to your comments and suggestions, please let me know what you think in the comments section below. Of course the my goal is to get you to try the recipes I post here so let me know what you thought, what you changed, or what you think could be better. Good Eating!

One of my favorite foods in this world are Enchiladas.  I absolutely adore them because they are complex while still being comforting, much like a warm spicy blanket.  With that being said, they are usually relegated to fall and winter eating, as are most oven baked foods... I miss cookies! Thankfully, through the genius that is Rick Bayless, I have discovered a perfectly summery version of this fantastic dish. It combines everything that makes enchiladas great: rolled, filled, corn tortillas smothered in a flavorful sauce and gooey cheese, and completely flips it on its head (at least as far as we Americans understand them). The word 'Enchilada' is an adaptation of 'enchilar' which means to season (or decorate) with chile. So ... enchiladas don't need to be red? NO!  Actually, in this adaptation they are vibrantly green and to me, taste deliciously of summer. The roasted Poblano Chiles bring their grassy, mildly hot flavors and the addition of spinach plays well with the sweetness of the roasted chile. The best part of this dish is the fact that it can be made mostly outside on the grill!  Let's see how: (scroll to bottom for recipe without pictures)

Enchiladas Especiales Tacuba Style (rickbayless.com)

2 fresh poblano chiles
1 cup (lightly packed) roughly chopped spinach leaves
2 cups milk
2 cups chicken broth
6 tablespoons (3 ounces) butter—or you can use vegetable oil
3 garlic cloves, peeled and finely chopped
1/2 cup flour
Salt
3 cups coarsely shredded cooked chicken (I usually use a rotisserie chicken or leftover grilled chicken)
12-18 corn tortillas
A little vegetable oil for brushing or spraying
About 1 cup Mexican melting cheese (Chihuahua, quesadilla, asadero or the like) or Monterey Jack, brick or mild cheddar
A little chopped cilantro for garnish


The first step is to roast the poblano chiles over high heat until blackened all the way around. If you are doing this on the grill you can put them right on the grate, if you are doing it in the house, I have found the best way to do this is to place an open steamer basket on the burner and roast the chiles on top of that.  It works like a champ! (thanks, Alton Brown)

Here we are at the first step and already we can get creative.  The poblanos are relatively mild and bring more flavor than heat so if you want some more heat, add a jalapeno or ten, or even a serrano (my personal favorite). I tried this recipe with just the poblanos and would have liked a little more heat so next time I make it, I will add 2 serrano chiles, but it is amazing as is too.

After the chiles are blackened all the way around place them in a bowl and cover with plastic wrap.  This will help the skin steam off of the chile and make peeling them a lot easier. Let them sit for about 15 minutes. After they rest, the chiles will be ready to remove the skin, seeds, and stems. This is much easier if you do it under running water. Then, roughly chop and add to a blender jar with the
spinach.
 

In a medium saucepan, combine the broth and milk, over medium-low heat to warm.

The sauce is a basic Bechamel sauce.  Simply melt the butter in a saucepan over medium heat and add the garlic, cooking until fragrant, then add the flour, cooking for a few minutes to cook the rawness out of the flour. Once the flour is ready,
(about 1 minute), add the hot broth and milk and bring the mixture to a boil.  Once boiling, reduce the heat and simmer for 5 minutes until the sauce is thick enough to coat the back of a spoon. Now we can finish the sauce.  Pour half of the sauce mixture into a blender with the chiles and spinach (make sure you remove the center piece of your blender lid, and cover loosely with a towel, or you'll redecorate your kitchen a nice shade of green). Blend until smooth. Then, add back to the rest of the sauce and mix in. Season with salt to taste (I needed 2tsp).  Add about 1 cup of the sauce to the shredded chicken.

Preheat oven to 350 degrees, or set up a charcoal or gas grill for indirect grilling.  

Brush or spray the tortillas with oil and bake for 3-5 minutes to warm.

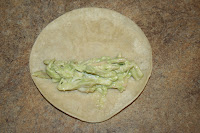
Spread the sauce in the bottom of a baking dish or use a foil pan if you are going to cook them on the grill. Start rolling the chicken mixture in the tortillas and set them in the baking dish, working quickly so the tortillas stay warm.  Top the enchiladas with sauce to cover (you may have sauce left over, I did), then top generously with cheese.  Bake or Grill (using indirect grilling)  about 20 minutes or until the cheese is brown and bubbly. Garnish with chopped cilantro and devour with a bit of crema.


Enchiladas Especiales Tacuba Style (www.rickbayless.com)

2 fresh poblano chiles
1 cup (lightly packed) roughly chopped spinach leaves
2 cups milk
2 cups chicken broth
6 tablespoons (3 ounces) butter—or you can use vegetable oil
3 garlic cloves, peeled and finely chopped
1/2 cup flour
Salt
3 cups coarsely shredded cooked chicken (I usually use a rotisserie chicken or leftover grilled chicken)
12-18 corn tortillas
A little vegetable oil for brushing or spraying
About 1 cup Mexican melting cheese (Chihuahua, quesadilla, asadero or the like) or Monterey Jack, brick or mild cheddar
A little chopped cilantro for garnish


DIRECTIONS


1.    Make the sauce.  Roast the poblanos directly over a gas flame or on a baking sheet 4 inches below a very hot broiler, turning regularly, until the skins have blistered and blackened on all side, about 5 minutes for an open flame, about 10 minutes under the broiler. Place in a bowl, cover with a kitchen towel and, when handleable, rub off the blackened skin, tear open and pull out the seed pod and stem. Quickly rinse to remove any stray seeds or bits of skin. Roughly chop and put in a blender jar.  Add the spinach.
In a medium (3-quart) saucepan, combine the milk and broth, set over medium-low heat to warm.
In a large (4-quart) saucepan, melt the butter (or heat the oil) over medium.  Add the garlic and cook for a minute to release its aroma, then add the flour and stir the mixture for a minute.  Raise the heat to medium-high.  Pour in the warm broth mixture and whisk constantly until the sauce boils.  Reduce the heat to medium and simmer for 5 minutes.  Remove from the heat.
Pour half the hot sauce into the blender with the chiles and spinach.  Cover loosely (I remove the center part of the lid, secure the lid, then drape a cloth over the whole thing) and blend until smooth.  Pour the mixture back into the saucepan with the remaining sauce.  Taste and season with salt, usually about 2 teaspoons.  
2.    Finish the enchiladas.  Heat the oven to 350 degrees.  Smear about 1/4 cup of the sauce over the bottom of each of four to six 9-inch individual ovenproof baking/serving dishes or smear about 1 cup of the sauce over the bottom of a 13x9-inch baking dish.  Stir 1 cup of the sauce into the chicken.
Lay half of the tortillas out on a baking sheet and lightly brush or spray both sides of the tortillas with oil; top each tortilla with another one and brush or spray those with oil.  Bake just to warm through and soften, about 3 minutes.  Stack the tortillas and cover with a towel to keep warm.  
Working quickly so that the tortillas stay hot and pliable, roll a portion of the chicken up in each tortilla, then line them all up in the baking dish(es).  Douse evenly with the remaining sauce and sprinkle with the cheese.  Bake until the enchiladas are hot through (the cheese will have begun to brown), about 20 minutes.  Garnish with the cilantro and serve without hesitation.